Happy Tuesday! I hope everyone had a fabulous holiday weekend, in honor of all those who have and who are serving in the Military.
Today I want to share with you a layout and several techniques!
It's a fairly simple layout at first glance... but when you start breaking it down... there is stamping, sewing, misting... oh boy!
The first technique I want to share is my Tissue Tape/Glossy Accents Butterflies!
To make these I used Tim Holtz's Tissue Tape, Martha Stewart Butterfly Stamps, & Glossy Accents.
Step One:
I put Tissue Tape on my cardstock.
Step Two:
I stamped my image on to the Tissue Tape.
Step Three:
Once the stamped image was dried, I covered with Glossy Accents. This step took the longest because it took several hours for the Glossy Accents to dry... but it was well worth it!
Once the Glossy Accents dried, it made my butterflies flexible... and I was able to work with the wings and bend them to create a more dimensional embellishment. I made the antennas out of decorative wire from the craft store.
The second technique that I have for you today is stamping with Hero Arts Shadow Inks. See how I have butterflies stamped all over my layout... very soft, but very colorful....
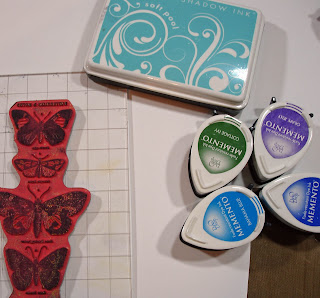
This is what I used to create that.... Memento Dye Ink, Hero Arts Shadow Ink, and various stamps.
I inked up my stamp with various colors using the Memento Dye Ink. I then lightly stamped onto scratch paper... I then without cleaning my stamp, I inked my stamp with the Hero Arts Shadow Ink... You can repeat these steps over and over, creating a lighter and lighter stamped image... until all you have left stamping is you Shadow Ink... it creates awesome effects!

Lastly, my title. I used my Silhouette to create the title. Once it was cut, I outlined it with a white opaque gel pen and then misted it with Perfect Pearls Mist, Heirloom Gold.
I hope you have been inspired! Have a wonderful day!


I am, love those butterflies, going to make me some. Great ideas. TFS
ReplyDeleteAwesome techniques :)
ReplyDeleteLove this! Very vintagy butterflies with a modern twist. I'm linking this up on Practical Scrappers today!
ReplyDeleteAwesome idea you could do this with die cuts punches, tfs. Club ck led me to your page I will have to bookmark your page love finding new ways to use my stash. 2 twists today on one of my goto papercrafting tools.
ReplyDelete