Saturday, December 5, 2020

Sugar Skull Poinsettia Snowman

It's beginning to look a lot like Christmas... Glitter is everywhere. Take a look at my studio, glistening, with Blank Page Muse, Red & Green, and Copics! Ok, maybe I do need to just stick with creating art. I am so excited to be here today and apart of the Ornament Showcase featuring Blank Page Muse Stamps. 

I would like you to meet the newest ornament for my tree... My Sugar Skull Poinsettia Snowman! 


I started with wood pieces that I bought a few years ago... you know, those things you just have to have and then they sit in the "one day I will use them" bin. I painted them with White Liquitex Paint and then a slight glossing with ColourArte Primary Elements in my favorite color: Dragonfly Wing. 


Now, time to stamp and color. I used a Sugar Skull from the Day of the Dead Sugar Skulls Marigold Flowers Scared Heart Stamp Set and the Poinsettia from the Classic Christmas Art Set. I stamped the images in Memento, Tuxedo Black Ink and then colored with my Copic Markers and Atyou Spica Markers. 


I had so much fun curled up in front of the fire coloring. 


Once I had everything colored, I fussy cut out the images. The hat I drew, colored, and cut out as well. Then I started to put my Sugar Skull Snowman together. I cut up one Poinsettia and used pop dots to add a little dimension to the Snowman's hat. 


Here is a close up of the Poinsettias at the base of the snowman. You can see how beautiful the sparkle is from the Atyou Spica markers. 


I really love this Poinsettia Stamp and so enjoyed coloring them. 

Using my drill, I drilled holes into the sides for the arms to stick in and a hole in the top for a hook to be able to hang it. You can see the support chipboard pieces I used and the hook at the top. 


So my snowman had her own little photo shoot around my home amongst all the Christmas decorations.


I hope you are feeling a little more festive and inspired. ...and don't forget to keep coming back to see all the amazing ornaments and Christmas inspiration the Blank Page Muse Design Team has for you this holiday season. 

Until next time... Happy Creating! 


Tuesday, December 1, 2020

Some Exciting News...

Oh Happy Day! I have some exciting news to share... finally! I have had to keep it under wraps for a few weeks. ...and sometimes that is not an easy thing for me to do. So, now, without further ado... 

I am so excited to announce that I am apart of the 
2021 Blank Page Muse Design Team! 


I am so excited to spend the next year creating and inspiring with these amazing and talented ladies using the phenomenal stamps from Blank Page Muse!

You can find all kinds of inspiration at the links below: 


...and you can find me on
Instagram: the_mad_inker 

I look forward to our creative journey together! 

XOXO, 


Tuesday, November 24, 2020

Happy Accidents

 We all know that phrase, “Happy Accident.” 

As crafters we use it often to describe a project or technique that we attempted, but, it did not go as planned. Well, today, we are going to explore what became my “happy accident.” 
This past weekend, with coffee in hand, I entered my studio, determined to learn this technique I saw online. 
I felt pretty confident. I had watched all the videos and read about the supplies used…

I got this, yes! …Ummm, No. First try I quickly realized I had to have a Dye Ink Pad. Then the second, third fourth… what am I missing!? Maybe a different paper? Nope. I am back to the drawing board on the original technique I was trying to learn, but I am here today to show you the “Happy Accident” technique that I stumbled upon.


Supplies Used: 
and all these goodies you see below: 


Are you ready to play? Let's go! 

You want to ink up your Gel Press with Dye Ink and a Brayer. Sounds simple, right? I forgot to mention, this little “happy accident” is quite simple, but yet has endless possibilities.


Now, you want to dip your paint brush into your watercolors and Splatter the Gel Press. I used Primary Elements and also just basic watercolors. I will be playing around with other mediums and encourage you do to! ...and let me know how it goes!


Primary Elements Colors Used: Azurite, Forest Green, Mulberry, Wintermist Grey
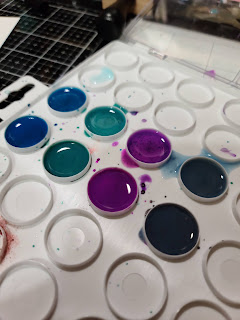
Before I got started I mixed the Primary Elements Pigment Powders with The Solution. I ended up also doing another row of water than I mixed the main mix in just using my paintbrush. (...I am telling you, I really was approaching this like a science experiment!)


With my paper laid down, I flipped over the Gel Press and laid it on top of my paper, and then smooshed it down


Doesn't that just look cool!? This is the point I got super excited to unveil this masterpiece I have created using this new technique! ...and this is also where I realized that it was a 
"Happy Accident."
(This is not how it was supposed to look per the technique I was trying to learn, but I love how it does look!)


Now it is time to get inky with the Distress Inks!

Ink the edges of your card. I used Weathered Wood. 


Then place a circle stencil down for your moon and ink it up! (I cut mine out with my Silhouette Cameo and stencil paper so I can use over and over again).


Using Fossilized Amber I inked in the circle to create my moon. 


Then rip up a piece of paper and lay it down as a mask and then use Distress Ink to ink up everything below that line. Here I am using Peeled Paint.


Now time to Stamp!

Using the Silhouette Style Bare Tree from Blank Page Muse, I stamped my tree. 


Here is the same technique using different colors and also adding a little more spooky to it! (I am completely afraid of spiders, so I felt very proud of myself for using this creepy guy!)


I hope you have enjoyed playing along with me today and are feeling inspired to go get inky with your Inks, Gel Press, & Blank Page Muse Stamps! It has been a pleasure sharing my "Happy Accident" with you and I am sure there will be more to come! 

Here are some fun outtakes from this creative session: 


Never be afraid of playing and trying new techniques. You never know what you're going to discover! 

Until next time... Happy Creating! 

XOXO, Christine


Click the links below for more inspiration and to connect with the Blank Page Muse Community!

The Blank Page Muse- https://blankpagemuse.com/


FB Fan Page-  https://www.facebook.com/groups/blankpagemuse/


Instagram Shop-  https://www.instagram.com/blankpagemuse/


Instagram Blog-  https://www.instagram.com/blankpagemuseblog/


Twitter-  https://twitter.com/BlankPageMuse


Pintrest- https://www.pinterest.com/blankpagemuse/boards/


Sunday, August 30, 2020

Masterpieces are what happen while we are making other plans...

Technically that is not how the quote really reads. It goes like this: 

 "Life is what happens while you are busy making other plans." -John Lennon

Not only is this a brilliant quote for life, but also for artwork. As artists, we have all had that moment where we start a project with great plans in our little creative brains on how it is going to turn out... and sometimes those plans, when executed, for whatever reason, are a complete bust! ...and that is exactly how this layout started... 


Using one of my favorite Prima stencils and Finnabair Art Basics Modeling Paste, I created the base of my layout. I love the texture and couldn't wait to see the color accent the texture. I have been watching lots and lots of mixed media videos over the past couple of weeks while being laid up sick and also teaching myself about the Gelli Press. One mixed media video I watched was using Faber Castell Gelatos and a dripping technique. THIS was the technique I wanted to use on this layout. 

Gelato Tip: Cover your surface with gesso. This will give you a nice base for the the Gelatos to blend. 

So, out came Finnabair Art Basics Clear Gesso and I did a light coat over my paper. 

The technique I wanted to try was using the Gelatos at the top and then misting them to let the colors run down... it did not go as planned. I then tried to use different colors of Gelatos to fill in all the white that was left... even worse results! 


I hated it! Not at all what I had imaged in my head. There were a few sections I liked, but overall... it was a dud! 

So in comes the Gelli Plate to save the day! I used Dina Wakely Heavy Body Acrylic Paint in: Lapis, Lime, and Turquoise. I just rolled the paint out out on to the the Gelli Press and then pressed my paper into it. I used the 9x12 Gelli Press. ...and I LOVE how it turned out! 


Using Distress Oxide Ink in Squeezed Lemonade, I inked up the edges. I used Distress Ink in Picket Fence to go over the raised areas from the the stenciling and modeling paste, but wasn't wild about it, so I then grabbed Hickory Smoke and went over it again. 

Next I wanted to add some circles. So, I designed a circle template on my Silhouette Cameo 3 and cut it out... side note: I bought a new laptop early this year. I finally used the bluetooth feature on my Silhouette. FREAKING AWESOME! ...one less chord on my desk. 


I drew the circles on the layout with my General's Sketch & Wash pencil. Then used a water pen to trace the circles. 

Once dried, I filled them in with a Gelato in Coconut. 

Once that layer dried, I added highlights with Gelato in Lunar. 

Then, once dried, I traced the circles with my black Zig Pen. This is where I am at now: 

I have really enjoyed watching this layout bloom into something that I love. ...because, I really thought it was a goner at the beginning. Today I am going to pick out my photo for it and finish putting it together. Stay tuned! 

Supplies I have used so far... 


Until next time... Happy Creating!