Sunday, March 2, 2014

Transparencies & Pocket Pages

Hello Lovelies! Today I want to share some layouts that I did this weekend. I actually got a WHOLE event scrapbooked! There is one layout I will not be able to share because it is for my article, Liberating Layouts, over at Unruly PaperArts. This month the theme is borders. I recommend jumping over there and see what everyone has created. My article will appear on March 7... Here is a sneak peak: 


OK, I am done being a tease... 
Here is my layout that I want to share today. It has several layers of transparencies and a little modeling paste too.  

I started with a black and white striped piece of paper. My table had a stack of scrap pieces from transparencies I used on a recent mini-album that I created and I just started grabbing and layering.  

Texture and multi-medium on my layouts is an addiction for me! I am always adding a little here or there... On this layout I used a Prima Stencil and Modeling Paste.
Here is a close up: 

I layered more paper and added a chipboard letter for my title. The heart is covered in Glossy Accents. 

The title is an introduction to this series of layouts. "I love these moments."
 Moments spent with friends, hanging out and laughing... I am blessed. 


One thing that I am really having fun with right now are all the different page protectors that are out there on the market. The two I use are We R Memory Keepers and American Craft Project Life. 

Below is a layout I did using a Project Life Photo Pocket Page: 

These pages are a lot of fun to create! To do my title I laid out 4 journaling cards and just added the paper (scraps work fabulous for these pocket pages!) and my title. Oh! and a little spray ink! 

The journaling went on the back of this page along with the last of my photos. 

Here is the back page, (I edited one photo out... like the journaling says, sometimes picture taking is not the greatest idea...). For the center row, I just used some pretty pink glitter paper. 

Awhile back I found these Page Protectors at Hobby Lobby: 

HOW FUN! I love them! 

So to end this night out's layouts I did a little 5x7 layout: 
FRONT:

 BACK:

Well I am off to create a little more. Hope you have a wonderful Sunday afternoon.
XOXO


Sunday, February 16, 2014

Close Your Eyes & Jump!

Happy Sunday. Today I want to share a tag with you that I did a couple weeks ago. I am away from my studio right now because I am dog sitting. I need to be creating more right now than ever. These past few weeks have chewed me up, spit me out, and then stepped on me and I need a major healing session with my inks, paper, and paints! Through the tears and hurt I have learned some very valuable life lessons. I have also never been more sure of who I am and what type of person I want to be. 

Life is tough. There are highs and lows & smiles and tears There is enough negative in the world and I want to be that positive light. From a kind word, a smile, or an act of kindness, I want people to leave their encounter with me feeling a little happier. I lost that determination for a moment or two... and let me tell you, I was pretty miserable. 

I am, however, finding that, at times it is a balancing act, and that sometimes it takes a strength in me that I didn't even know I had. There is a Chinese Proverb that says, "Even a toad has 4 ounces of strength." Well let me tell you, I have a lot more ounces on me than a toad! This tag reminds me to just close my eyes and jump. Life doesn't start when you get to the destination. Life is the JOURNEY to the destination. 


I still can remember the joy I had creating this tag. I just let go and all the sudden this tag was born. No rules, no pressure, no one telling me that I can't. Here is a little bit from the process: 

I started with a little ink: 

I used a resist technique that I haven't used in a while... I forgot how much fun it is: 
Embossing with White Embossing Powder.  
After stamping I went back over the tag with more Distress Ink. The embossing powder resists the ink, so once I was finished I just wiped the ink off the stamped image. 

One thing I struggle with is throwing away "scraps". Here is one that I was finally able to use! I cut the dress form out of mirror paper and kept the scrap. To use it on this tag, I trimmed it out and adhered it.

I am wishing you a very happy Sunday and blessed and inspired week. 
Happy creating! 
XOXO

Monday, February 10, 2014

Painting the Town...

Happy Monday! I hope everyone is staying warm. As I am typing, I am wrapped in a blanket in front of a fire. ...and it is only going to get colder here!

Today I am so excited to share that Genuinely Jane Studios has teamed up with The Crafter's Workshop to bring you all kinds of inspiration!

Working with the Genuinely Jane Studios Cascade Album and The Crafter's Workshop Urban Landscape stencil I created a album to hold all my photos from my nights on the town!

I started with a little Gesso and adhered it right on to the unfinished wood: 

I sprayed the wood generously with a mist that I made using the following: 
1. Distress Re-Inker - Black Soot
2. Perfect Pearls - Blue Patina 
3. Water
Put all three ingredients into a Mini-Mister and shake it up! Now for a little magic... 

The Gesso acts as a resist... so I was able to take a damp wipe and wipe the ink off my buildings:

Once all wiped down, I went in with the second part of the stencil, a dabber, and Staz On ink in Royal Purple. 

...and when I lifted my stencil, I was in love! 

(The shimmer that you see is from the Perfect Pearls that was in the mist)

In fact... I loved it so much that I changed my whole concept for the book. I did not want to cover up any of my buildings! 
So I used acetate pages throughout and left my wood pieces to be seen in all there glory. Here are some of my pages: 

The theme behind this album is "Paint the Town". I have included some of my favorite photos from my nights out with friends. I still have quite a few to add, but made sure that there was plenty of space, pockets, and tags to put photos. 


Going to see bands play is one of my favorite things to do. I have a whole section for these pictures. If you look closely on the left, you can see that the photo is on a piece of acetate. 


...and it wouldn't be a complete Paint the Town album without a picture of my Bestie & Me... we are partners in crime. Our Friday texts usually go something like, "Want to get into some trouble tonight!" (DISCLAIMER: we really don't get in trouble... we just like going out and having fun....) 


and what night out would be complete without silly crazy pictures... I created a pocket with tags to hide these little gems... Here is the front and back of the pocket: 

I thoroughly enjoyed working on this album with my stencil and gesso. Until next time, HAPPY CREATING! 

XOXO-


Sunday, January 26, 2014

A Chip of the Old Block!

Hi... thank you for stopping by! I have a confession for you today... Outside of my complete obsession for all things paper crafting, I am a computer nerd too! Hehe! Here is a layout that I did that showcases this little fact about me. 

It started with this sketch from PageMaps... 

I was instantly inspired and knew what I wanted to do... I found the sketch on my lunch break, so I printed it out and wrote and sketched all over it until I could get home and create away... 

...and this is my idea come to life...

I started with the background. I found this image on Google Image Search and sent it to Costco to print out as a 12 x 12 background. (This is one of my favorite little tricks to really customize a layout... whether it be a picture like this or one of my own). 

Awhile back I spilled coffee on my laptop keyboard.. very sad. So I had to order a new one because it was all sticky... Once I installed the new one, I kept the old one to use the keys on a layout. When these pictures were taken, I just knew this was the layout I was waiting for... 


They worked out just perfect! I also had an old old laptop that died a few years ago, and I took it apart and stole the RAM out of it to include on my layout: 

...and then my jounaling documenting this memory with my Dad. Behind it are a couple of tags and one of them has a picture on it!

This layout was so much fun to create. Using the unique embellishments and being able to capture this memory with my Daddy! 

What is the most unique thing that you have used on a layout? Until next time, Happy Creating! 

Wednesday, January 22, 2014

another BLOG HOP!

Welcome to the Frog Dog Studio and Genuinely Jane Studios Blog Hop! 

This week the design teams are showcasing projects from the Frog Dog Studio January Mixed Media Kit, featuring an Exclusive Genuinely Jane Studio Telephone Booth Wood Album. Both teams are excited to share their kit projects and show you how they were inspired by Genuinely Jane products. 

Be sure to follow the blog hop list below as you hop from one blog to the next. Lost? Return to the Frog Dog Studio blog or the Genuinely Jane Studio blog to see who to hop to next! 

We love Frog Dog Studio kits and Genuinely Jane Studios product so much, we want to share them with you! Visit each blog and leave a comment for a chance to win one of the following:

1. ONE winner will be selected to receive a $25 Frog Dog Studio Gift Certificate to use in the Frog Dog Studio store.


2. ONE winner will be selected to receive a $25 Gift Certificate from Genuinely Jane Studios to use for GJS books in the Genuinely Jane Studios Store.


You must visit each blog and leave a comments on all blogs in order to qualify.

Comments are due by midnight EST, Friday, January 24th to qualify for the drawing. Winners will be announced shortly after the end of the comment period, so be sure to check back to see if you've won.

If you have been hopping along, then you just came from Scrappin' Madge. If you just came to visit and want to start at the beginning, then click HERE

So can you imagine my surprise and joy when I got my box full of goodies from Frog Dog and Genuinely Jane Studios.... 
OH BOY!!! I know, right! 

I started with the cover of the telephone booth album: 

Step 1: Cover the album with Gesso. 
Step 2: I rubbed Glossy Accents are part of the album and used Fresco Flakes to add some texture. 

Let me tell you... this Liquitex INK is absolutely AMAZING!!! I am in love with this stuff and I just used it for the first time this week.... I need all the colors now! 

The Mixed Media ink is pretty neat too... After I inked up my phone booth I used a paint brush and the ink pad to draw the details on to the phone booth. 

The pleated border I took and inked up like crazy! Using a sponge I inked up the strip. Then I stamped on to it using the Mixed Media Ink... (going to have to get some more of this ink too!). After all this was dried, I used a paint brush to paint swirls on to the border. 

The kit comes with some really great tissue paper... I introduced it to some Perfect Pearls Mist: 

Remember that phone book I was working on? Here is a close up: 


...and then the layout comes together: 
Using some of the other goodies in the kit, I added some embellishments here and there. One thing that is neat to do is stamping on various embellishments. I stamped my Genuinely Jane Studios stamp onto the little "H" card. 

I do have to mention that the whole time I was doing this layout I had the song Telephone in my head by Lady Gaga...! 

There are all kinds of details throughout this layout.... but it is now time to hop on over to see Ildiko! 

Hope you have enjoyed the hop so far. Make sure you leave comments so you can be entered in to the drawing for prizes!!! We LOVE prizes! 

Until next time, Happy Creating! 

Friday, January 17, 2014

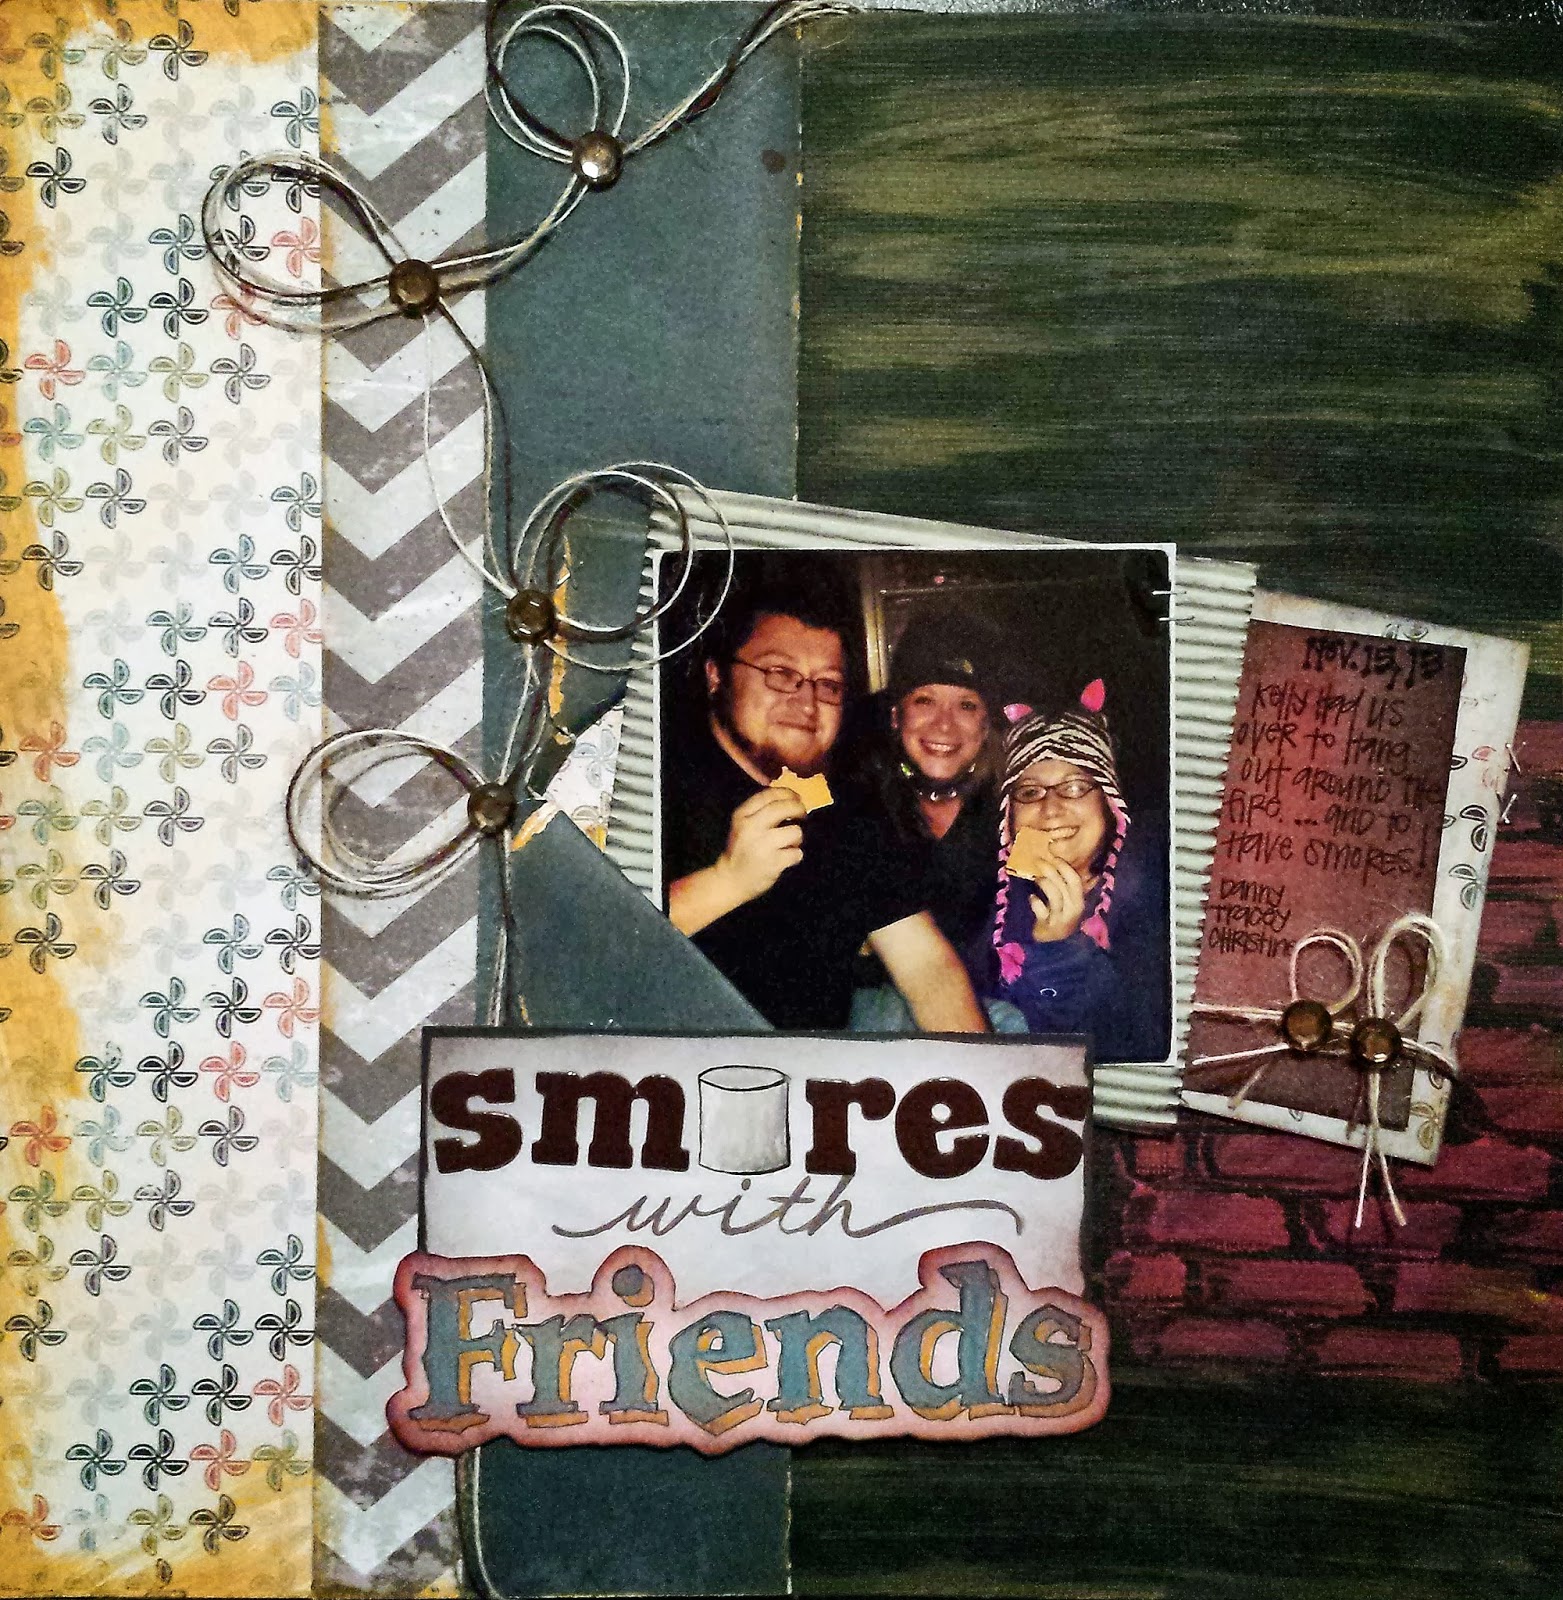
S'more Techniques Please...

Happy FRIDAY! here is a little inspiration for you today.... 

I used lots of Distress Paint on this layout by dry brushing the background, inking the edges, and stenciling.

I also had lots of fun with twine, twisting and looping all the way up the layout!

....a little more twine.

Here is a close up of how I ripped and folded my paper back to create a little "pocket" for my picture.

My title is a mix of Thickers, hand writing, and sketching with my Silhouette. I drew the marshmallow for my "o". 

Wishing you a weekend full of inspiration and creativity!
XOXO