
This album has been in the making for quite some time! It is a Bo-Bunny waterfall chipboard album. One day I decided to spray it with my Tattered Angels Glimmer Mist in Tattered Leather. I was amazed at how awesome it looked! I inked the edges with Tim Holz's Distress Ink in Walnut Stain and that was it! It set up on the shelf with the other "to-do's". Then one day something magical happened... I saw these Graphic 45 papers sitting on the shelf at the scrapbook store in all their glory and instantly was inspired! I have been working on it on and off since then in between layouts and other projects...
I wish I could tell you that this is the completed product... but it is "almost" the completed product. My Aunt is sending my mom several boxes of slides from their childhood and that is where I am going to find most of my pictures. I am making this album a dedication to the generations: My Grandmother & Grandfather, My Mother, and me. I want to show the resemblance between us and also to have pictures of my Grandmother that will be out to look at and share. I never met my Grandmother, but from what I have heard and seen in pictures, she was a fabulous person full of life and personality. She past away due to breast cancer when my mom was in her early twenties. My Grandfather has told me that I look like her and on my wedding day my Aunt told me that I reminded her so much of their mother, and that means a lot to me.
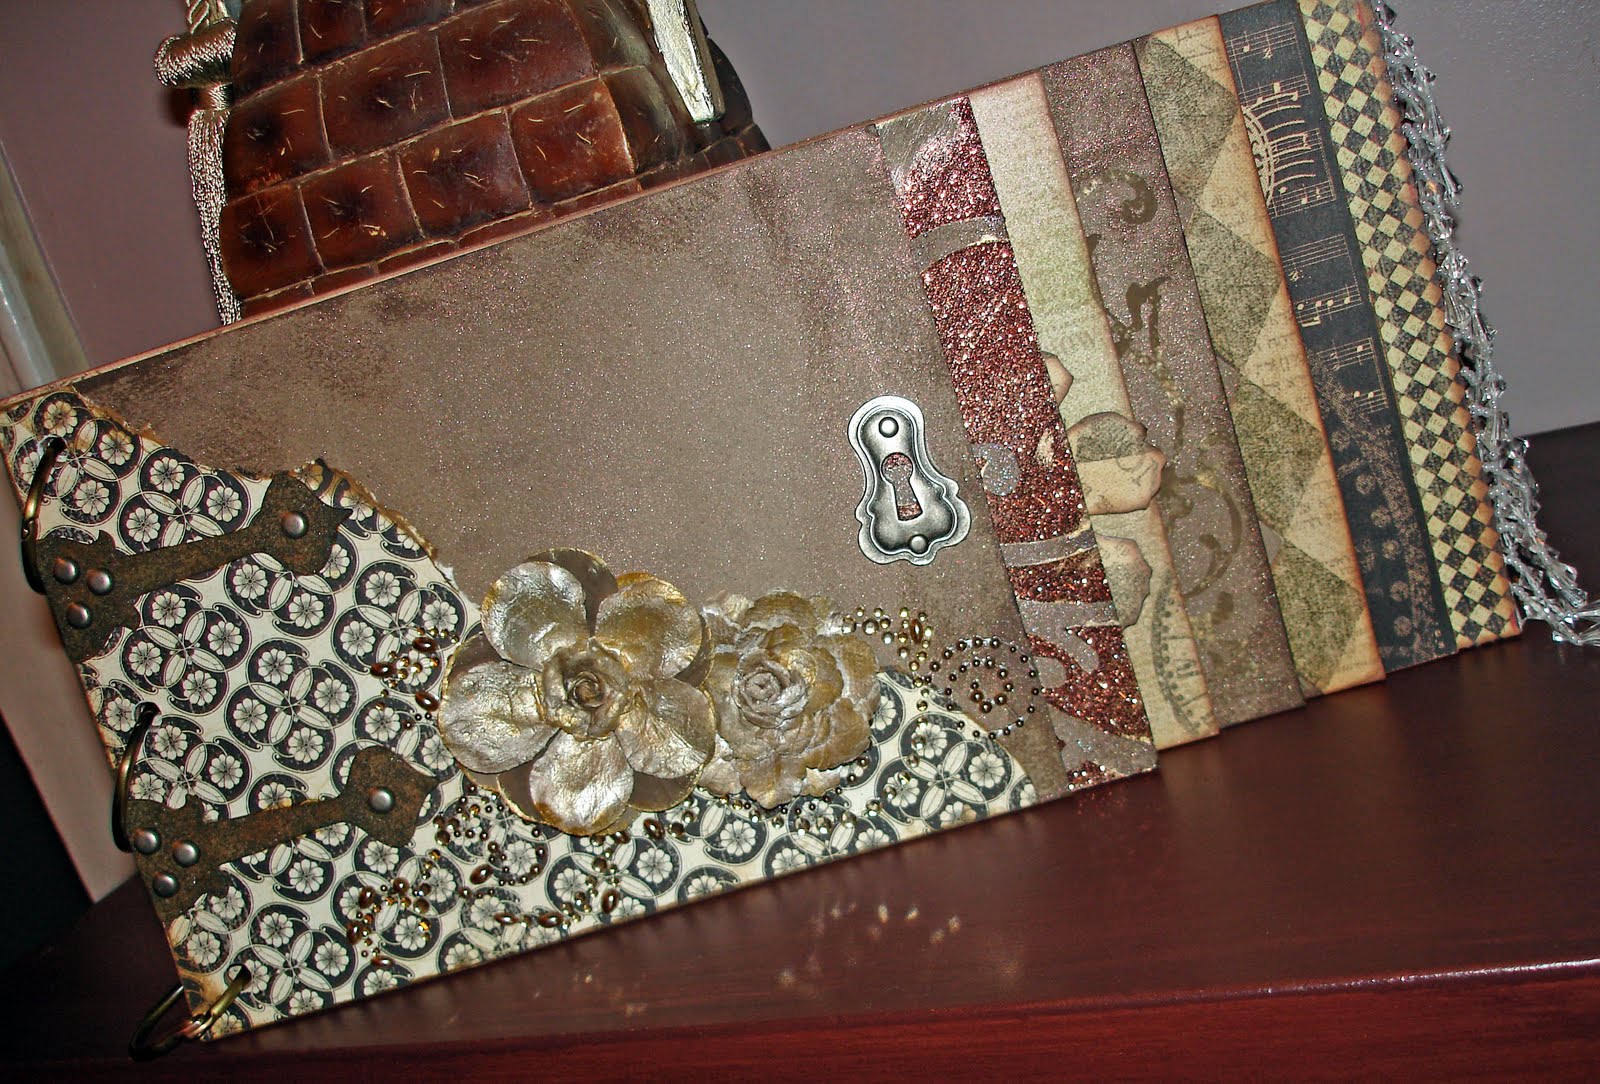
So that is a little history as to what is going to go into the album... now without further ado: a closeup!

On the front cover I used Prima Flowers that were white and I painted them with Adirondack Paint Dabbers, in Gold and Espresso. The bling you see is also from Prima. The paper is "Hip to the Jive" from the line Times Nouveau Collection from Graphic 45. (All the papers used are from Graphic 45...)
Below is a really neat technique! I learned this from Tim Holtz's "A Compendium of Curiosities". It is rusted grunge. I took Grungeboard, Distress Embossing Powder, and Distress Ink all this together and waa-lah! Rusted Grunge!!!


This is the back of the cover, I used "A Fine Specimen" from the Communique Collection. I cut out the keyhole so you can see all the way through.

This page was fun! I used a Tim Holtz's Mask and went over it with the Adirondack Gold & Espresso Paint Dabbers. I lightly brushed glue over the one side and added glitter.

The paper on this page is "Society Page" from Communique Collection. The flowers I cut out using Tim Holtz's Alteration Dies. This dies has four flowers on it and it is, I think, one of my most favorite dies ever!!! My friend is the one who actually has the die and Big Shot. I am binding my time til I get it by using one that I cut out and I trace it and fussy cut it every time that I want to use it! A lot of work, but so worth it for these flowers!

The center of the flowers are embellishments from Vintaj.

This paper is the back of "Hip to be Jive". I used my flower stencils that I cut out from the Alterations die I talked about from above... I centered the "stencil" on top of one of the clocks and cut it out. Underneath that flower is actually the same flower but used as a mask with Glimmer Mist colors Olive Green & Latte. I did cut out all the flowers from a sheet of Tim Holtz's Masks so I could use them with Glimmer Mist and other inking techniques as well. Did I mention that I love these flowers?

This page actually has a happy accident on it! I stamped my design throughout my page with Versamark and then embossed with clear embossing powder. I then used by Adirondack Gold & Espresso Paint Dabbers to create a Shabby Chic look that is also from "A Compendium of Curiosities". I had fussy cut these shapes from Hip to be Jive earlier in the project but never used them... I laid them out on this page and they fit perfect into my stamped image! (That's my Happy Accident!)

I love stamping with my Paint Dabbers, it truly has a Shabby Chic look. Here I am using a stamp from Tattered Angels. I dabbed a little Gold on in places and then went back with the Espresso to get my two toned look. This is a great way to add a little more to your stamping, and you can use your ink pads too! Just remember to always use your lighter color first so as not to mess up your stamp pads, paint dabbers, etc...

So, I hope that you have enjoyed and have been inspired. I look forward to finishing this album with my pictures soon.

This is amazing!! So loving this album and can't wait to see it completed! You can use those TH dies in a cuttlebug too in case you have one of those, you don't have to get a Big Shot or Big Kick.
ReplyDeleteHUGS!